
Art Lesson for The Family School
Navajo Sand Painting - The Place Where Gods Come and Go

The children will understand that the Native American group, the Navajo, or Dine’ (Dee Neh), settled in the Four Corners region of the United States. They will learn how the Navajo use sandpainting in sacred cultural practices and how to create sandpaintings of their own. Additionally, the children will understand that it is in holy temples that God gives further instruction about His plan and the creation of the world.
Academic Concept: The Navajo (Dine’) settled in the Four Corners region of the United States and used sand to create sacred paintings.
Gospel Principle: In holy temples we can find peace and learn of God’s plan of happiness.
Home Preparation & Materials
Colored sand
Glue
Paint brush
Cardboard or thick paper
Vocabulary
Navajo—Native American group that settled in the Four Corners region of the United States
Dine’ (Dee Neh)—translates to “the people”, name the Navajo call themselves and prefer to be called
drypainting—another name for sandpainting, using sand and dry materials to make works of art
hogan— traditional Navajo home made of poles, mud, branches and leaves.
LESSON
Attention Activity
} Lead the children to a room or space with four distinct corners where there is room to run around.
Today we are going to play a game called, “Four Corners.” We will name each corner of this room a
color. We will call this corner the “black” corner. } Name the others, “blue”, “yellow” and “white”.
Place a colored paper or colored object in the corresponding corner, if needed, to remember what
each corner is named. Now, one of us will stand in the middle of the room, close our eyes and count
to four slowly. We will call this person “the counter.” While the counter’s eyes are closed the rest of us
will run to one of the corners. After the counter finishes counting he/she will call out a color and open
his/her eyes. Everyone who is in the corner with that name has to run to another corner without getting
tagged by the counter. (If no one is in the corner called that has been called, the counter closes his
eyes, counts to four and calls another color.) If the runners are touched by the counter they go to the
middle and help the counter tag the runners when the counter calls out the next color. After everyone
is safely in a corner (and in the middle if previously tagged) the counter and helpers close their eyes
and count slowly to four again. The counter calls out another color and the game continues until
everyone is caught in the middle. Any questions? Let’s play! } Choose a child to be the first counter
and begin the game. Continue the game until all children have a chance to be “the counter”.
Lesson
- Did you like the “Four Corners” game? (Accept any answer.)
Did you know that Four Corners is not only a game, it is also a place? Four Corners is a place in the
western United States where four states come together into one spot. If you went there you could lay
down and be in four states at the same time! Let’s look at Four Corners on a map.
} Show (1) Map of Four Corners.
- What states connect at the four corners? (Utah, Colorado, New Mexico, and Arizona.)
- Have we been to any of these states? (Answers will vary.)
- What is the land and weather like in that part of the United States? (Dry, desert, colorful sandstone.)
Long before the United States government divided this land into states there was a group of people
living there. This group of people was called “Navajo” by the Spanish explorers who found them. But,
the people called themselves “Dine’” or “the people.” Today this Native American group has its own
land and government. It is called the Navajo Nation.
The people of the Navajo Nation, the Dine’, also have their own language, religion, and way of life.
Because they live in the desert they have traditionally used branches, mud and leaves to build their
homes. They call these homes “hogans.” This is a picture of a hogan. } Show (2) Navajo Hogan.

- Would you like to live in a hogan? (Accept any answer.)
The Dine’ used their own four corners to map out their land. They used four mountain tops- one in
the east, one in the west, one in the north and one in the south. I am going to show you a map of their
land, Dine’tah.

- What do you notice about this map? (It looks different than other maps, it is shaped like a person, it is made of colors, shapes and symbols.)
- Did you recognize anything about the four colors they used to represent the mountains in each corner of the map? (They are the same colors we used in our Four Corners game!)
This map is just a diagram, or drawing of the actual map, because the original map was drawn on the
floor of a hogan with sand. It was a special kind of drawing called a sandpainting. Sandpaintings are a
very important part of the Dine’ culture. To teach their families religion, history, and creation stories,
Dine’ parents and grandparents still use pictures drawn with sand, and they chant songs.
Sandpaintings are used to teach the people, but they are also used to bless and heal the people.
The Dine’ word for the sandpainting is “iikaah”, meaning “a place where the gods come and go.”
The Navajo or Dine’ believe that the sandpaintings are a kind of portal or doorway where the gods
can visit them and help them.
(Lee Anderson, “Legends in the Sand: The Evolution of the Modern Navajo Sandpainting,” Americana.net, 2011)
Through the sandpainting and the special ceremony that goes with it, they believe the gods can restore balance and harmony to their lives.
Through the sandpainting and the special ceremony that goes with it, they believe the gods can restore balance and harmony to their lives.
In these ceremonies a Singer or a Medicine Man chants to call upon the strength of specific gods. Then,
they create a picture with sand on the ground (or on an animal hide). The pictures they paint are of very
specific images. The Navajo or Dine’ have over 600 images
(http://www.bsu.edu/classes/magrath/205fall/navajosandpaint.html) They believe these special images
were originally given to their ancesters from the gods themselves, and passed down from one Medicine
Man to another. The Singer carefully recreates the sacred image checking to make sure there are no
mistakes.
In a healing ceremony the person who is ill sits in the center of the completed drawing where the gods
can come take away the illness. Because they only want to call on the gods when they are in special
need, and also to dispose of the sand holding the illness, they sweep away the sandpainting before
nightfall. (http://www.collectorsguide.com/fa/fa083.shtml) If the ceremony lasts several days (some last
9 days!) a new sandpainting is created the next morning and swept away again at night.
(https://en.wikipedia.org/wiki/Sandpainting)
Let’s look at some sandpaintings!
} Show (4) Navajo Sandpainting. It may be helpful to display the photograph while you discuss, or view first, ask questions, then view again.

In this photograph of an actual sandpainting you can see some features that are in all Navajo
sandpaintings, such as: symbols, symmetry, and borders. They used symbols for people, gods,
animals, and plants.
- Do you see any human shapes? (Four in the middle, two at the top.)
The artists have used symmetry and balance, and objects arranged in fours.
- Count how many times you see groups of four repeated. (Answers will vary.)
There was a border usually made to look like plants, feathers or arrows to ward off evil. It is left open
without a border on one side. This side always faces East. They believe that this is the side from which
the gods enter. And at the opening there are always small figures or animals standing guard.
- Where is the border on this sandpainting? (Around the bottom and sides.)
- How many figures do you see standing guard? (Two.)
- What colors of sand were used? (Light and dark brown or reddish brown, white, black.)
The sandpainter also created the colored sand as part of the special process. Aside from the
regular sand color, the main colors they added to the sand were white, blue, black and yellow.
They used crushed gypsum for white, charcoal for black, a mixture of gypsum and charcoal for blue,
and for yellow - ochre, corn meal or flower pollen. They made other colors by mixing these with red
sandstone, powdered roots and bark. https://en.wikipedia.org/wiki/Sandpainting
Let’s see a picture of Navajo men creating a sandpainting. This is the picture on our new flashcard.
} Show (5) Navajos Sandpainting

Look closely. Do you see the bowls of sand? The sandpainters took sand into the palm of the hand
and carefully let the sand slip out of their hands using the thumb to dispense more or less sand.
A big sandpainting like this one took several people to create, because it all had to be completed in
one day.
- Isn’t it beautiful? (Accept any answer.)
- Do you see any symmetry or groups of four? (Four sections, four corn stalk symbols.)
Many people wanted to enjoy the beauty of the sandpaintings, but did not want to disrespect the sacred
nature of the images. A sandpainting, like the one we just saw, was only allowed to be photographed if
the images were purposely changed from the sacred ones. The artists would purposely paint errors,
substituting colors, animals or symbols from the real ones, so as not to call on the gods unnecessarily.
Some artists preserved the beautiful images of sandpaintings by weaving the designs in rugs and
blankets. These recreations of the sandpaintings were slightly changed from the real images out of
respect for the sacred symbols. Here is a sandpainting design that was woven into a rug.
} Show (6) Navajo Sandpainting Rug.

- Now that you have learned about sandpainting, what symbols and features do you see in this sandpainting? (A border, opens to east, guardian at east, corn symbol, four sections, etc.)
Today some artists preserve sandpaintings as art by painting glue on a board or animal hide before
painting with the colored sand so that the sand will stick. We will get to try this method today as we
create our own sandpaintings!
Today we have learned that, “The Navajo (Dine’) settled in the Four Corners region of the United
States and used sand to create sacred paintings.” Write this academic concept on the board.
GOSPEL CONNECTION
- Do we believe that there are places on the earth where God visits? (Yes.)
With the blessings of the restored gospel we actually do have places on earth where God visits. God
visits His holy temples! It is in these sacred places that we learn more about God’s creations and His
plan of happiness for His children.
We are taught that the temple is “literally the house of the Lord... The Lord visits his temples, and they
are the most holy of all places of worship.” (https://www.lds.org/scriptures/gs/temple-house-of-the-lord?lang=eng)
The Lord really does visit his temples. Above the door of every temple on the earth are these words,
“Holiness to the Lord. The House of the Lord.” Those who go to the temple are able to feel His Spirit
in His house. This makes these places very special.
- Did you notice the murals on the walls with mountains and animals? (Accept any answer.)
In the temple there are rooms like these where we are taught about God’s beautiful creations,
including his plan of happiness.
President Gordon B. Hinckley taught that the temple is “a school of instruction in the sweet and
sacred things of God.” Here we learn about “the odyssey of man’s eternal journey from premortal
existence through this life to the life beyond.” (Gordon B. Hinckley, Teachings of Gordon B.
Hinckley (1997), 635)
It is so wonderful that we can learn the truth about God and His creations in such a sacred place.
I am grateful that we can know about who we were before we came to earth and where we will go
after this life.
We learn in temples that God is our loving Heavenly Father who wants to bless us and help us be happy. He wants us to live with Him again someday.
- Would you like to go to the Lord’s own house and learn about Him and feel His Spirit? (Accept any answer.)
You can! You can prepare right now to visit and serve in God’s holy temples.
- What can you do to prepare now to go to the temple? (Follow Jesus example, learn the gospel, pray, be baptized, receive priesthood for young men, keep your mind and body clean, hang a picture of the temple in your room, etc.)
All the efforts we make to be worthy to go to the temple are worth it. The blessings we receive as
we go to the temple are amazing! Listen to what President Thomas S. Monson said about the
blessings of the temple.
“As I think of temples, my thoughts turn to the many blessings we receive therein. As we enter
through the doors of the temple, we leave behind us the distractions and confusion of the world.
Inside this sacred sanctuary, we find beauty and order. There is rest for our souls and a respite
from the cares of our lives.
As we attend the temple, there can come to us a dimension of spirituality and a feeling of peace
which will transcend any other feeling which could come into the human heart. We will grasp the true
meaning of the words of the Savior when He said: “Peace I leave with you, my peace I give unto
you. … Let not your heart be troubled, neither let it be afraid.”
Such peace can permeate any heart—hearts that are troubled, hearts that are burdened down
with grief, hearts that feel confusion, hearts that plead for help.” (Blessings of the Temple,
Thomas S. Monson, Ensign, May 2015)
- What does President Monson say the temple will bring us? (Peace.)
} Bare testimony of how the temple has blessed your life.
Today we have learned about the Navajo or Dine’ sandpaintings made of sacred symbols,
and their belief that gods can in some way enter this world and bless people. We believe that,
“Temples are houses of the Lord. The Lord visits his temples. In holy temples we can find peace
and learn of God’s plan of happiness.” Write this gospel principle on the board.
ART PROJECTS
Art Supplies
All Children: Colored sand (see Colored Sand Handout for how to make colored sand. Purchase or prepare the sand before the lesson.), glue, pencil paint brush, cardboard or thick paper
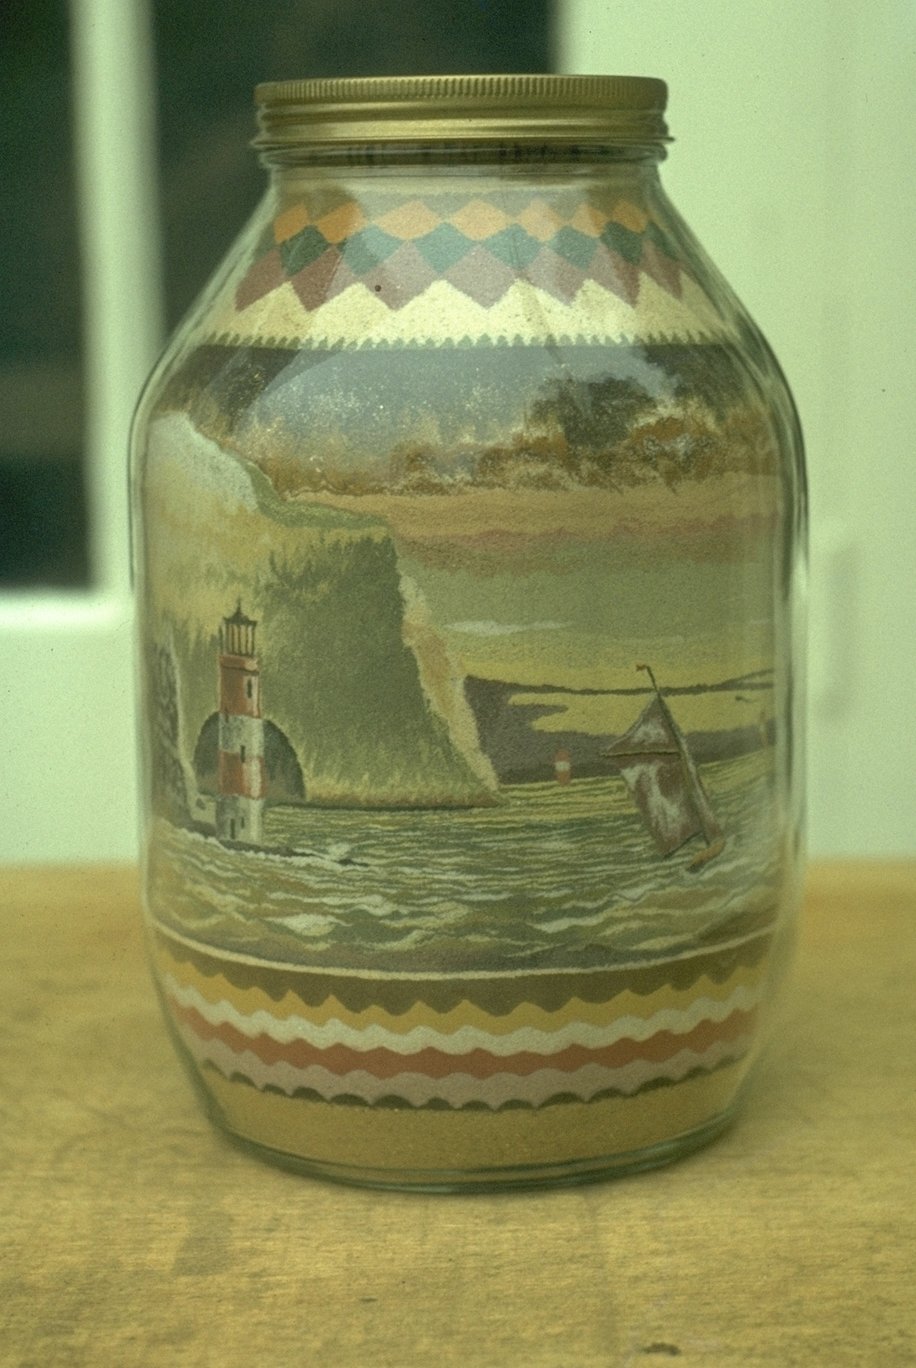
Observer: Colored sand, clear jar or bottle with lid, paper or plastic funnel, spoon.
Littles Activity: Sand in a Bottle } This project needs 2 or more different colors of sand, a small clear glass jar or bottle with a lid.
- Place the colored sand in individual small bowls first.
- Then place a paper (or plastic) funnel in the mouth of the jar or bottle you will use to make the layered sand art.
- Use a spoon to scoop the sand into the jar one color at a time.
- Change the colors of sand to make layers in the bottle.
- Repeat step 3 until the jar or bottle is full of sand.
- Place the lid on the jar or bottle and display your sand art in your home or bedroom.
- Take a photo of your finished project and place it in the My Projects section of your art notebook.
Assignment: Place some sand in a shallow container. Use your finger to draw Native American
symbols into the sand. Shake the container to erase the symbols.
Middles/Bigs Activity: Sand painting
} If you have not already done so, prepare colored sand using one of the methods in the
(8) Colored Sand Handout. Pass out (9) Native American Symbols Handout to each child.
To see a simple example of this sand painting project watch (10) How to Make a Sand Painting Video.
1. Place each color of sand into small bowls.
2. Prepare a paper sized piece of thin particle board, a piece of cardboard (like cereal boxes), or thick
card stock for your sand painting canvas. } Tip: Place the paper in a shallow box to catch the sand for
less mess to clean up.
3. In a small bowl mix a little water with some school glue to the consistency of thin paint.
4. Using the Native American Symbols handout choose a few symbols to tell a story in your sandpainting.
5. Use a pencil to sketch a simple design on the cardstock or cardboard using some of the Native
American symbols you chose. Add Navajo designs that are symmetrical or in groups of four around
the symbols. Then draw a border to complete your design.)
6. Use a paintbrush to paint the thinned glue over on your drawing. (Tip: Paint only a small area at a
time so the glue doesn’t dry before you can get the sand on it.)
7. Take the colored sand in the palm of your hand and sprinkle it on the glue. Continue to sprinkle the
sand to color in your sketched design.
8. Shake off the excess sand, let dry and display.
9. For a more permanent art piece, spray the sand painting with “Fixative” found at art and craft stores
or aerosol hair spray.
9. Place the sand art in a sheet protector or take a photo of your finished project and place it in the My
Projects section of your art notebook.
Assignment: Write a “key” for the Native American symbols you used. For example: If you used the l
ightning symbol in your artwork on a separate paper draw a zig zag and write next to it “lightning”. Do this for all symbols used.
MORE FUN WITH SAND PAINTING
Further Research:
Read article and view beautiful images of LDS Native American artwork,
“Southwest: Latter-day Saint Native American Art, Sacred Connections” (Liahona, September 1995).
Learn about other types of sand painting, called Mandala, done by Tibetan Monks in
Mandala Sand Painting by Tibetan Monks Video.
Research Australian Aboriginal Sandpainting.
Art Project:
Practice some of the other methods for coloring sand listed in the Coloring Sand Handout.
There are several options for preparing colored sand for the sandpainting art project. You can
buy, collect, or create and color your own.
1) Buy- precolored sand can be purchased at Amazon.com, OrientalTrading.com, or at most
craft and art supply stores. (You will need enough sand for each child to spread sand over a
glued legal paper sized canvas.)
2) Collect- If you live where there is sand, collect some from your yard or neighborhood.
Collect a variety of colors if possible. If you want to be like the Navajo you can also collect
charcoal, flower pollen, ground up stones and corn meal.
OR
3) Create- You can color your own sand.
Choose a sand substance, add a coloring agent, mix together and you’ve got colored sand!
Sandlike substance + Coloring agent = Colored Sand!
Dirt from the Yard Food coloring paste
Sugar Dry Tempera Paints
Salt Sidewalk Chalk Shavings
Playground sand
(can be purchased at home and
garden supply stores, like Home Depot)
*You can use a wet coloring agent, like liquid food coloring or liquid paint but you will need to
spread out the sand after mixing to let it dry to prevent sand (sugar or salt) from sticking together.
Family Night Idea: Lesson on preparing for the temple from The Friend.
The Temple- I am Going There Someday (Friend, August 2009).
Lesson Plan Resources
(1) Map of Four Corners
Record Resources
(8) Colored Sand Handout } One for parent.
(9) Native American Symbols Handout } One for each child.
Enrichment Resources
Sand art in bottle Image